
If you’re suffering from severe back pain, yoga is the only advice any doctor recommends. Yoga could be a mind-body medical care that’s usually counseled to treat not solely back pain however the strain that accompanies it. The appropriate poses will relax and strengthen your body.
Practicing yoga for even some minutes daily will assist you to gain additional awareness of your body. This will assist you to notice wherever you’re holding tension and wherever you’ve got imbalances. You can use this awareness to bring yourself into balance and alignment.
1. Cat Pose / Cow Pose Yoga
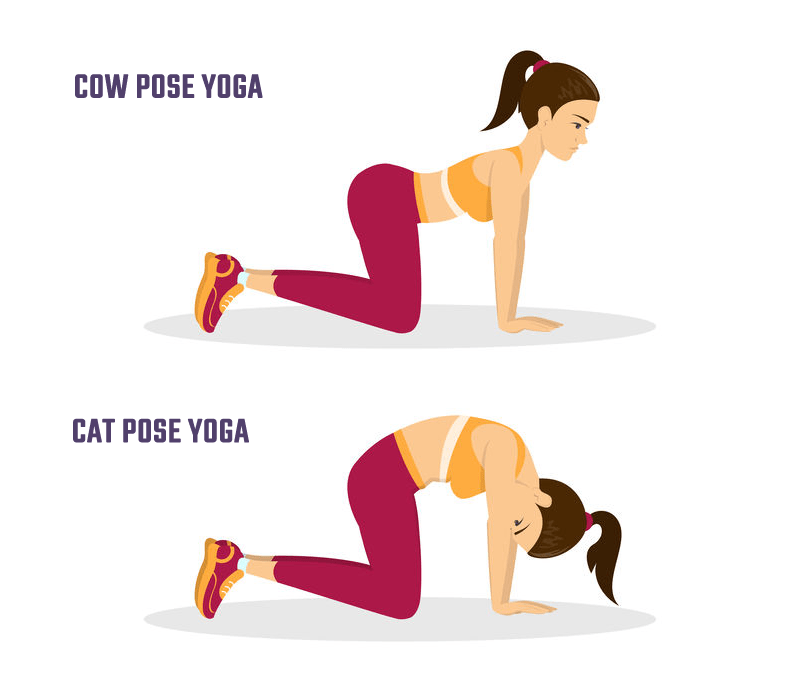
Procedure to do Cat/Cow Yoga
- Start on your hands and knees along with your wrists directly beneath your shoulders, and your knees directly beneath your hips. Point your fingertips to the highest of your mat. Place your shins and knees hip-width apart. Center your head in an exceedingly neutral position and soften your gaze downward.
- Begin by stepping into Cow Pose: Inhale as you drop your belly towards the mat. Lift your chin and chest, and gaze up toward the ceiling.
- Broaden across your shoulder blades and draw your shoulders removed from your ears.
- Now make Cat Pose: As you exhale, draw your belly to your spine and spherical your back toward the ceiling. The cause ought to appear as if a cat stretching its back.
- Release the crown of your head toward the ground, however, do not force your chin to your chest.
- Inhale, returning into Cow cause, then exhale as you come to Cat cause.
- Repeat 5-20 times, then rest by sitting back on your heels along with your body part upright.
2. Child Pose Yoga
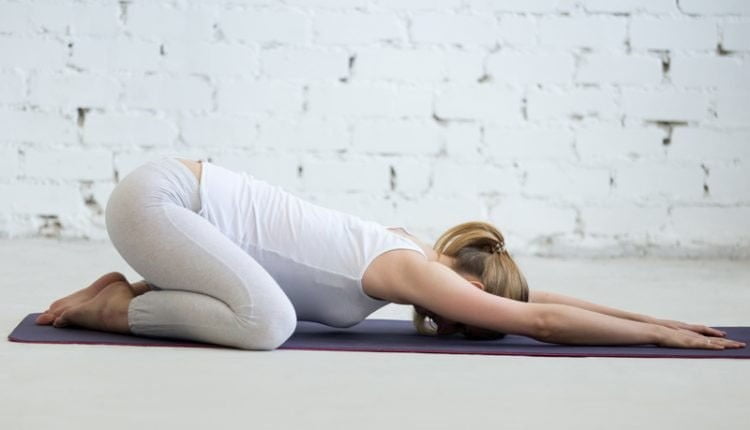
Benefits of Child Pose Yoga:
- Gently stretches your lower back, hips, thighs, knees, and ankles.
- Relaxes your spine, shoulders, and neck.
- Increases blood circulation to your head, minimizing headache symptoms.
Procedure to do Child Pose Yoga
- Sit back on your heels with your knees together.
- You can use a bolster or blanket underneath your thighs, torso, or forehead for support.
- Bend forward and walk your hands in front of you.
- Rest your forehead gently on the floor.
- Keep your arms extended ahead of you or bring your arms aboard your body together with your palms facing up.
- Focus on emotional tension in your back as your higher body falls significant into your knees.
- Remain during this cause for up to five minutes.
3. Triangle Pose Yoga
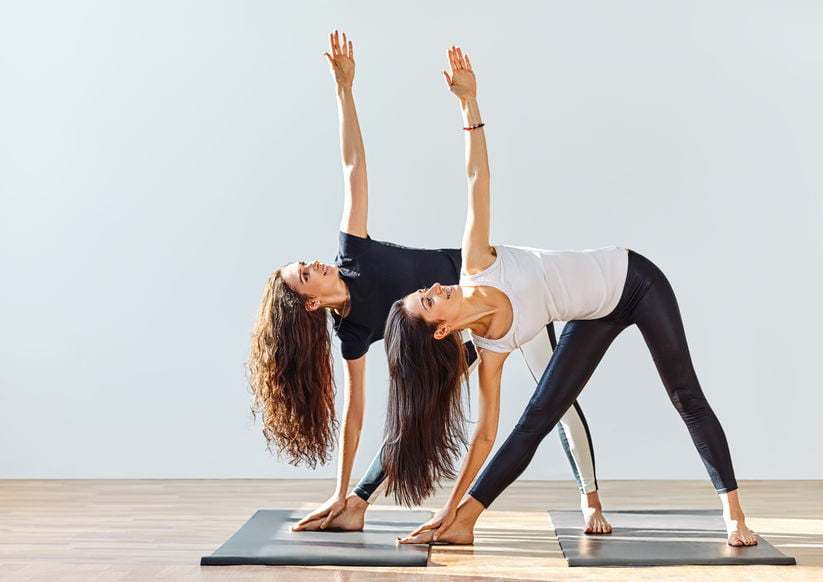
Benefits of Triangle Pose Yoga:
A deep stretch for the hamstrings, groins, and hips, Trikonasana conjointly opens the chest and shoulders. It helps relieve lower back pain, stress, and sluggish digestion. This pose strengthens the muscles in the thighs, hips, and back while toning the knees and ankles
Procedure to do Triangle Pose Yoga
- From standing, walk your feet concerning four feet apart.
- Turn your right toes to face forward, and your left toes out at an angle.
- Lift your arms parallel to the floor with your palms facing down.
- Tilt forward and hinge at your right hip to come forward with your arm and torso.
- Bring your hand to your leg, a yoga block, or onto the ground.
- Extend your left arm up toward the ceiling.
- Look up, forward, or down, Hold this pose for up to 1 minute.
- Repeat on the opposite side.
4. Cobra Pose Yoga
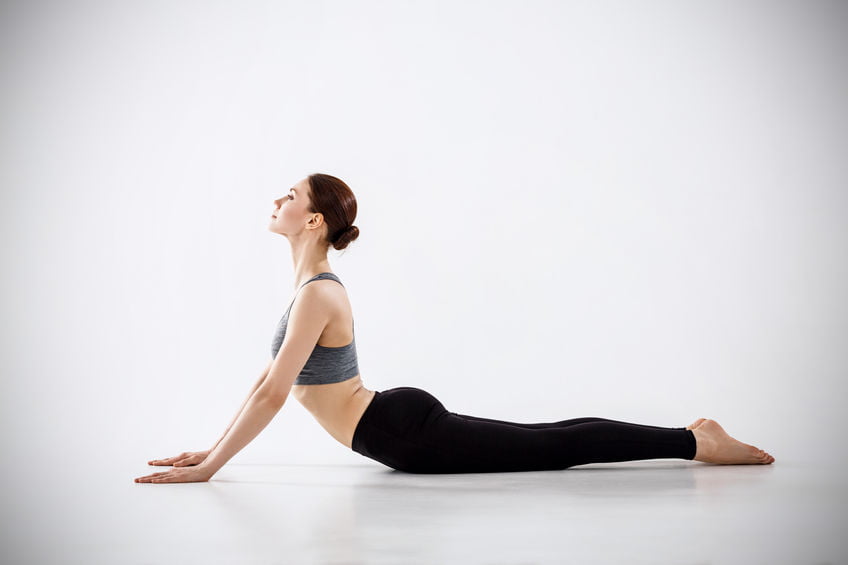
Benefits of Cobra Pose Yoga:
- Stretches muscles in the shoulders, chest, and abdominals
- Decreases stiffness of the lower back
- Strengthens the arms and shoulders
- Increases flexibility
- Improves menstrual irregularities
- Elevates mood
- Firms and tones the buttocks
- Invigorates the heart
- Stimulates organs in the abdomen, like the kidneys
- Relieves stress and fatigue
- Opens the chest and helps to clear the passages of the heart and lungs
- Improves circulation of blood and chemical element, particularly throughout the spinal and girdle regions
- Improves digestion
- Strengthens the spine
- Soothes sciatica
- Helps to ease symptoms of asthma
Procedure to do Cobra Pose Yoga
- Lie on your stomach with your hands under your shoulders and your fingers facing forward.
- Draw your arms tightly to your chest. Don’t allow your elbows to go out to the side.
- Press into your hands to slowly lift your head, chest, and shoulders.
- You can lift partway, halfway, or all the way up.
- Maintain a slight bend in your elbows.
- You can let your head move to deepen the cause.
- Release backtracks to your mat on Associate in nursing exhale.
- Bring your arms by your side and rest your head.
- Slowly move your hips from side to side to release tension from your lower back.
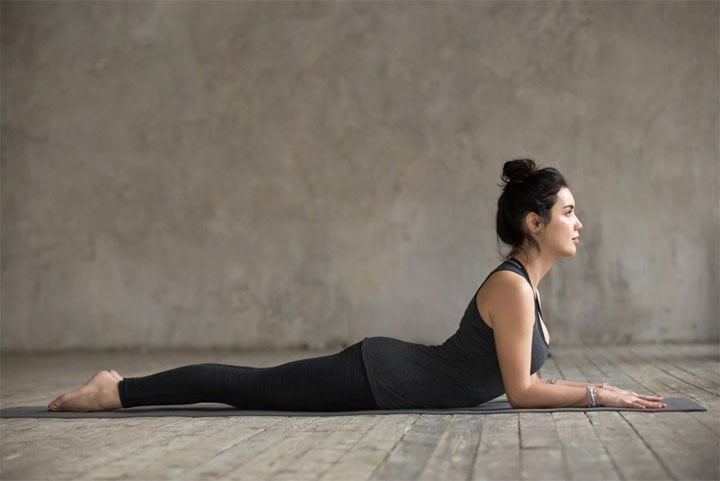
5. Sphinx Pose Yoga
Benefits of Sphinx Pose Yoga:
- Stretches and lengthens the spine
- Stretches the chest, lungs, shoulders, and abdomen
- Firms the buttocks
- Helps relieve stress
- Calms the mind
- Can be an awfully deep compression and stimulation of the sacral-lumbar arch
- Tones the spine. People with bulging or herniated disks may find this very therapeutic.
- If the neck is dropped back, the thyroid will also be stimulated.
- In the full Seal cause, the abdomen might receive a beautiful stretch, as well.
Procedure to do Sphinx Pose Yoga
- Lie on your abdomen together with your legs extended behind you.
- Engage the muscles of your lower back, buttocks, and thighs.
- Bring your elbows under your shoulders with your forearms on the floor and your palms facing down.
- Slowly lift up your upper torso and head.
- Gently elevate and have interaction with your lower abdominals to support your back.
- Ensure that you’re lifting up through your spine and out through the crown of your head, instead of collapsing into your lower back.
- Your gaze straight ahead as you absolutely relax during this create, while at the same time remaining active and engaged.
- Stay during this create for up to five minutes.
Bottom Line
Although recent analysis supports yoga observe as the way to treat back pain, it should not be applicable for everybody. Be sure to speak together with your doctor before beginning any new yoga or exercise program. They can help you identify any possible risks and help monitor your progress.
You can start a home practice with as little as 10 minutes per day.